
\
Welcome back my friends!I hope your week is going well! I have been so busy and so many great new things are in the works. Did you see the sneak peek of the catalog I posted yesterday? NO well be sure to check it out right HERE
Normally I will have a challenge for you on Wednesday but with all the new goodies I felt like it was better to show you some sneaks yesterday. We will get on the challenges soon I promise! Speaking of sneaks be sure to scroll to the bottom of the post to see a few more.
Lets get down to business, today is our Card of the Week (C.O.W.) I am excited to share a new project with a little instruction for you this week. I was inspired by this card from the catalog sample, but as always I kind of made it my own. I love that SU! gives us such stunning leaping off points. This one seemed to fit my mood-- I am happy and grateful for this life I am blessed to lead. I thank you all for being a part of it.

Today is our Card of the Week.
Thank you for Everything and More
What you will need:
 |
| Whisper White Heavy Cardstock (140272) |
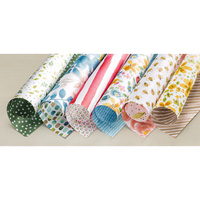 |
| English Garden Designer Paper (138440) |
 |
| One Big Meaning (139420) |
 |
| Pistachio Pudding Thick Bakers Twine(135635) |
 |
| Vellum (101856) |
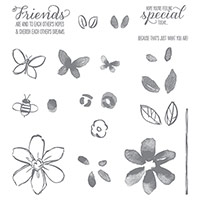 |
| Garden In Bloom Photopolymer (139443) |


Put it together:
- Cut an A2 card base (5.5 x 8.5 - score at 4.25) using Whisper White Cardstock
- Cut Kraft and White strips from English Garden Designer Pack at 5.25 x 4
- Cut Whisper White at 4.75x3.5
- Cut Vellum Strip at 1.5 x 8
- Stamp images from Garden in Bloom Stamps onto 4.75 x 3.5 Whisper White bleeding some of the images off the card
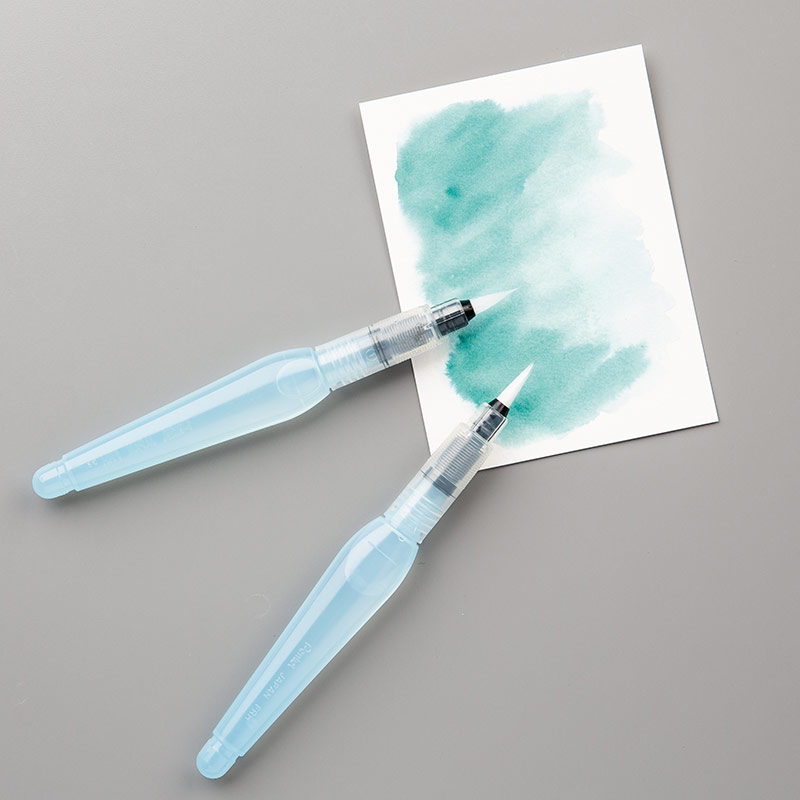
- Using the Aqua Pens or paint brush and inks add color to the images. This method creates a lovely watercolor look
- Tip: if you have a glass mat smear a little ink on to the glass and pick up ink with a wet brush. This allows for better control of the amount of ink you pick up and does not dilute your ink pad. If you don't have a glass mat you can also use the top of your ink storage.
- If you want the centers to be darker like mine are, wet your brush the remove excess water and then load your brush with full saturation of the ink.
- Punch one end of vellum strip to create the banner and stamp sentiment about .25" from the punched end *Set aside to dry or dry with heat gun
- Tie triple bow with Thick Bakers Twine
- Adhere Kraft and white Designer Paper to the base of the card
- Wrap vellum strip around back of the Stamped colored 4.75 x 3.5 whisper white and crease at desired length.
- Adhere the excess vellum flap to the back of the 4.75 x 3.5 Whisper White (this ensures no adhesive will be seen.
- Staple or using a Stampin Dimensions adhere triple bow through the vellum onto the 4.75 x 3.5 Whisper white.
- Adhere craft foam (or use Stampin' Dimensions) to the water colored 4.75 x 3.5 whisper white image.
- Adhere completed 4.75 x 3.5 Whisper White with Vellum attached to the front of the card.
I hope you enjoy making this fun and beautiful card. Feel free to play with the colors these could be a beautiful bright bouquet as well. To purchase any of the products you see in our COW visit my website by simply clicking HERE.
SNEAK PEEKS:
As I promised! Here are a few more lovelies for you. If you would like more information on how to become a demonstrator or if you just want to ask a few questions, shoot me an email. NEVER any pressure. (gzuswins@gmail.com)
 |
| This set... just makes me smile. I can't wait to incorporate it in a C.O.W. and a workshop! |
 |
| How clever is THIS? I think it is a great tree for a small space, maybe work? It would be great advertisement if you wanted to join my team and let everyone know The product really does sell itself! |
Have a blessed day my friends... and go Make Pretty Things!
Blessings,
Erika
For more information on joining my team CLICK HERE.
No comments:
Post a Comment