Saturday, December 5, 2015

I have more than one blog... it's true...


I have more than one blog because I have more than one interest.  I just wanted to share this holiday poem I penned tonight for a very sweet girl that is for me a daughter.  I thought it may help some of you here that are struggling this Season with the commercialization of Christmas and may need to "De-bug" this year

So please check out my blog : Concrete.Detail here

Enjoy.


Wednesday, August 19, 2015

Why I do....

WHY I DO...
IS TO SHARE WITH YOU
EVER SMALL AS IT MAY BE
A GLIMPSE OF ME. 


I am creative.  I am by no means the most creative person in the world. In fact, often after I spend only a few moments on Pintrest and am quickly humbled at the amazing ideas that float out there in the creative space of this universe.

I was thinking yesterday, Why do I do this?  Is it because I am a collector?  Am I an artist? Am I creative?  Then the questions that always finds a way into my thinking...  AM I an artist? Am I good enough?  WHY do I torture myself? WHY do I think I even have a chance at being an artist?  WHY do you do this Erika?  

Last night my husband and son went to play racquetball and I sat at my table cutting paper, embossing card front, creating a card to send to a friend in a heated battle with cancer, and I realized why I do...

I do because my art no matter if someone sees it, as campy or amazing is a part of me I can share with a big ugly dark world.  I have a little light (it's really a rainbow of my collections)  that I can cast onto the life of another.  I may not be and "artist" I am okay with that.  I know that my "crafting"  is a part of WHO I am not just something I do.  

I had a downline over yesterday, we worked very hard prepping for her upcoming workshop.  She is new to the business.  She works hard!  I am excited for her.  We spent a good 5 hours designing and practicing for her workshop.  I love sharing with my team.  I love seeing them come up with different takes on techniques, to see them discover something that excites them.   That is WHY I DO... I do because in my deepest places, I have a heart for art. I want to share it with the world

I get scared sometimes, I don't think I am good enough. I really struggle with that lie.   I put myself out there a lot.  I have overheard both good and bad.  I have felt my heart break when someone tosses my little part of me in the trash can. I have felt my heart overflow with warmth when I walk into someones home and see a bit of me still watching over them. I love the idea of one day making my art my sole financial source, and know that that only will happen if I keep myself working hard to better myself.  I am a fighter.  I believe I can do that.  I work very hard in many aspects of my life, wife, mom, bookkeeper, artist, friend whatever it takes to be the best me.  So while some don't see what I do as "artistic"  I choose to see myself as what I pray I CAN be.   I want to encourage you today. You are good enough, you are a blessing in my life, you are what you work hard to be.  You don't have to be the best in the world, just be the best you can be!  

Blessings
Erika

Monday, August 17, 2015

Paper PUMPKIN in the HOUUUUSE


 That is right friends!  Paper Pumpkin is in the HOUSE!! I love when I go to my mailbox, open it up and see that cute little red (orange - depending on who you ask)  box just sitting there waiting for a fun night of stampin!  It makes me almost giddy!  So this month Stampin' Up!  did a beautiful job with a fun trendy medium  CHALKBOARD!  it is everywhere and if you didn't know this already SU sells amazing Chalkboard paper.  It is even on SALE!  I love the texture it takes the Craft Whisper White ink just beautifully! I was super happy to find that you can get it in the clearance section right now.. only $3.19  THAT is a super great value!  Click HERE to see it on the site.  ALSO You can join Paper Pumpkin for 50% off your first 2 months.. that is just awesome!  I know once you get the first box you will be HOOKED!  Please be sure you designate me as your demonstrator (Erika Hayes Glendale, AZ 85308).

OK so enough of that... I wanted to share peeks of the newest addition to what I call P cubed (Paper Pumpkin Party).  You will see here a shot of the kit opened and the cute stamps but its not JUST cards this month friends!  Look closely and you can see great gift boxes -- yes they are included in the box! As ALWAYS everything is in the box! Your first month you even get an acrylic block!  That my friends means even if you don't want to become as crazy of a stamper as I am you can join Paper Pumpkin and every month get a little box of happiness complete and ready to go!  The other great thing for crazy stampers  you get a chance to try some of the product you may have wanted to try but not sure if you want to invest in the goodies. This month the Whisper White Craft Ink Pad is a good example.  It is not really that it is expensive, but you may have said "Oh I want to get THAT" but just forget to order it. (I do that all the time)  Paper Pumpkin gives you a sample of the best products and EXCLUSIVE stamp sets!  EVERY month so what do you really have to lose?  You get 2 months at 50% off.. so its like BOGO really!  Oh and no long term commitments.  If (which I doubt) you decide you want to take a break, just cancel.

--------------------------------------------------------
BACK TO THIS MONTH'S KIT:

I really hope you can see the stunning color palette  too!  Yes that is yummy gold foil!  It is perfectly combined with a blushing pink, white and of course chalkboard black!
 All the element are so beautiful this month.  I just love that I get to make some fun flowers and have a few great boxes for little gifts for --- wait for it... YES.. HOLIDAY gifts!  Its hard to believe but true!  The Season is sneaking ever so close.  I am also excited to share I have many workshops planned for the holiday season.  I hope you can join me for one or more. If you sign up for 3 you get $15 in SU products for FREE!  I am working with my TEAM to put together dates and times so be sure to check back soon!

NEED some EXTRA income with the holiday season sneaking so close?  Why not join my team and have support as you start a career in the glorious world of paper arts!  We are more than just a group of Stampin' Up! Demonstrators we are a family.  We are working as a team to improve our lives doing that thing we all have in common.... CREATING.  I do not ever leave a downline to do it all alone.  I am here for you to help you build a successful business.  I offer training EVERY WEEK!  So if you are interested in becoming a part of the MAKIN' PRETTY THINGS Team give me a shout.  I am here to make it as easy as possible.  Hobbyist or as a Career, we can make it happen for you!  Email me with questions: gzuswins@gmail.com

Blessing Friends
Erika

Friday, August 14, 2015

Coloring with LIGHT!

OK bare with me!  This post has many photos.  In the move, I have misplaced my SD card so I couldn't do a video!  In the photo it is difficult to tell, but the red is actually foil paper that releases with the holiday catalog.  YES this cute card was made with Christmas Cuties a new set for the holidays.

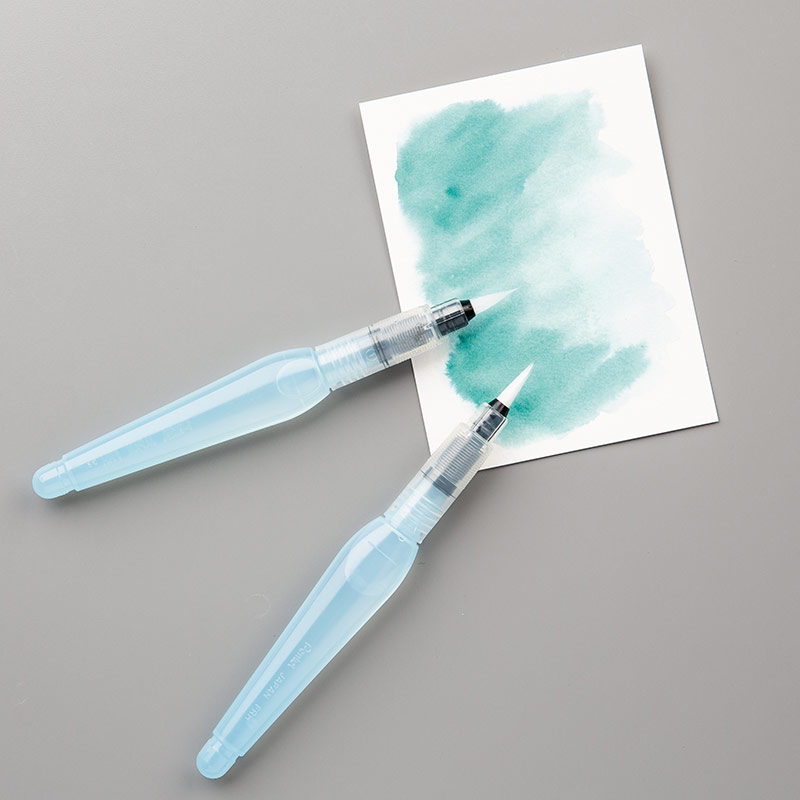
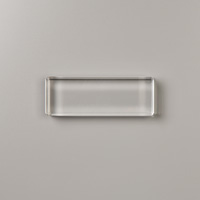
Let's talk about coloring.  It is fun , right?  Most the time yeah it is fun but it can be frustrating when you look at all those "professionals" work and think HOW do they do that?  Well today I hope to shed a little LIGHT (hahaha) on a easy way to ensure that you are using light to your advantage.  A quick story to explain how I came up with this technique.  I love me a good glass mat.  I have the WeR Memory Keepers glass mat and I use it for everything.  I use it to cut with my blades, to smear ink on for backgrounds or to act as a pallet for my watercoloring.  Glass mats are the best tool and one day while watercoloring an image for a card I looked at the mat and realized it has a tool that is remarkable!  Many cutting mats have this as well, but for this story it was the glass mat that gave me an epiphany. I want to begin there... my mat... this mat if you look closely has diagonal lines on it.  They kind of look like "rays" of the sun. I know it is hard to see with the light but they are there.  What I realized is these are great guides for coloring.  I can place the image I am working on on those lines and have a guide for the "highlights" (Figure 1)

That is where our technique begins.
Figure 1

Figure 2
Figure 3
The first thing I do is I decide what direction I would like the light to come from, in this case I wanted it coming from the upper right so I turned my mat to match that direction.  (Figure 2)Think of it like rays of light.  Then I decide how much light I want on my subject, do I want it to be hard light or soft, if I want it soft I place the image on the lines that are further apart.  As you can see in this image I secure my paper with a little washi tape. If I need to move the paper to get a better angle to color, I move the entire glass mat.  Securing the cardstock allows for my highlights to be consistent.  I will then add the image using the center line which will be my primary source of light (Figure 3 and Figure 4).  After I have stamped the image I begin to add highlights using a pale yellow.  Examine the image and ask yourself where would the light fall.  (Figure 5).  You can also get a strip of paper and follow the highlight line in the center of you image to check where the highlights should fall. (Figure 6).  Once you have your strip of paper, add small amounts of a pale yellow to the areas that would be raised and touch the yellow strip. (figure 7)

 In this set, there is not "chin" so I added a little one by using a slightly darker color.
Figure 4
Once you have the highlights you can proceed by adding some of the shadows. When coloring a face, it is a natural shadow just below the hair line, in the nape of the neck where the head would cast a shadow, under the nose and chin.   (Figure 8).
When it comes to hair, you want to know where the highlights are and then you naturally know how to color the hair. (Figures 9, 10 and 11)  You see that I have the pale yellow in place and I can see the places that would cast shadows better.  Thus adding a darker brown to the hair behind the neck, also on the folds of the hair.  This is also true with the clothing.  I added a bit too much yellow to a wing and the dress so I had to use greys to blend.  It works fine but I should have used a lighter yellow in those areas because the clothing and wings were to remain white.  On the sash (Figures 12, 13 and 14) you can see the effectiveness of adding a bit of yellow.  I made mine a little darker for demo purposes, but you can see how the yellow blends into the blue and literally highlights the places I designated.  Using the lines on my glass mat and my sun strip I was able to find the right spots to highlight.  It really is a matter of once you see the highlights you will naturally see the midtones and shadows.  The lines on the glass mat help me not lose my source of light.  I hope this tip helps you in your coloring.

Figure 5
 
Figure 6
Figure 7
Figure 8
Figure 9

Figure 10
Figure 11
Figure 12
Figure 13
Figure 14

Any questions?  No problem, just shoot me an email. gzuswins@gmail.com and I will try to get them answered as quick as a cricket!  Thanks for taking the time to read this long post.  I am going to try and get a card and turn this into a video.  I think seeing the hair colored in live action will truly help! 

Again you know I am a Full-Time Independant Stampin'Up! Demonstrator and the Makin'PrettyThings Team Leader. If you are interested in this kind of training and would love to be lucky like me and DO what you LOVE--- CREATE let me know and we will get you signed up for $99.  It doesn't get better than that... Start your own business for $99.  It was the best decision I ever made!  

Blessings Friends
Erika 

Thursday, August 13, 2015

Birthday Wishes C.O.W


Last night I put together the Watercolor Wishes Kit.  OHHH I love it. I made all those card in just a few hours and they are all unique and beautiful.  I enjoyed that the kit had everything I needed to complete each of these cards AND extra goodies to make more.  The kit has the block, the STAMPS, the inks, the embellishements, card bases, envelopes, step by step color instructions.  It is just FUN!

SO I was working with these last night and I fell in L.O.V.E. with the stamps set.  The script on the set.  I loved all the beautiful sentiments.  I am all for a Happy Birthday but I really like the Happiest Birthday Wishes it just made me smile.  SO I used the stamps from the Watercolor Wonder kit to create the C.O.W. (card of the week)  I ALSO wanted to share that I will be creating ONE monthly PDF with all the instructions for the Cards of the Week.  If you would like step-by-step directions please just let me know.  


I also wanted to add a quick tip.   As you can see I did not use the sentiment from the In this Together set (133869)  because I wanted to add the Happiest Birthday Wishes sentiment.  When a stamp set has the sentiment on the bottom like the "it's time to celebrate" image from In this Together it is a simple fix.  Simply cut a post-it to cover the sentiment (see below), ink the image, remove the post-it and stamp.
Notice I cut out the image after
stamping it on the post it.
I did this to ensure the least amount of
opportunity for ink to gather. 
I also used a round template to create the visual texture on the card by simply piercing the paper. I felt the card needed a drop shadow and created that by simply adding a very thin piece of Smoky Slate cardstock and lifting it on craft foam.  The image was colored using Copic Markers.

To make this card you would need:  
Copic Markers of your color choice. 
Craft Foam (I use adhesive backed foam)
In This Together Clear-Mount Stamp Set by Stampin' Up!
In This Together


I hope you enjoy this weeks C.O.W.  I am looking for a few contributors to the C.O.W.  portion if you are interested please send me an email at gzuswins@gmail.com   

Hope your challenge cards are coming along nicely.  I look forward to seeing them!  

Have a blessed day and tomorrow I have something I know you will enjoy!  A fun technique for casting light! 

Until then
Blessings Friends
Erika       

Wednesday, August 12, 2015

Makin'PrettyThings - Challenge Wednesday

You all know I was super excited about the Weekly special tag punch, well I ordered it!  I don't have it yet but I was so inspired by the taggy-ness that I decided that will be our challenge today!

Here is what I came up with....

Here is what I am thinking.... 
This challenge is to create a project -- card/scrapbook page/ mini album 
that is using at least THREE tags.  
NOW for the sample card I made it is a really simple technique.  I simply used washi tape to adhere the three tags together and then stamped on the other side! The fun is you can do sooo many things with this technique to create a scene or as in the case of our sample card break up a solid image for visual interest.    SO have fun!  Post an image in your comments or on facebook and tag me Erika Hayes.  Be sure to keep an eye open for the workshops coming up.  These techniques will be incorporated.  All my workshops are open to anyone.  If you are out of state, you can order the kits to complete one or all of the projects we make in any of my workshops.  Remember you can always join my team and become a part of the creative process.  

Our challenges will be posted on most Wednesdays.  Prizes will be mailed once a month (otherwise I will be at the post every week)  I hope you enjoy, play along and are able to share this blog with friends and like minded artist!  
 I will add all the names to a hat and draw a winner for a fun envelope of goodies! I am excited to see what you make. 

Supplies used in Challenge Card - ALL Stampin' Up! Products are available HERE
Tags - Recollections 
Whisper White Heavy Cardstock Stampin! Up!Basic Black Cardstock  Stampin' Up! You've Got This Stamp Set - Stampin' Up!Memento Ink - Tux Black available through Stampin' Up!Mint Macroon - Stampin' Up! 
Cherry Cobbler Extra Thick Bakers Twine - Stampin' Up!
Copic Markers to color image

Tuesday, August 11, 2015

Tantalizing Tuesday!


We  the weekly deals have hit the website this morning... and WOW one of my most wanted is on the list!  SO you know what I will finally be getting this fun tag topper. I love it I have seen so many adorable project to make with it and the new catalog has great tag ideas.  SO IN THE CART you go!

2014-2016 In Color Designer Washi Tape by Stampin' Up!
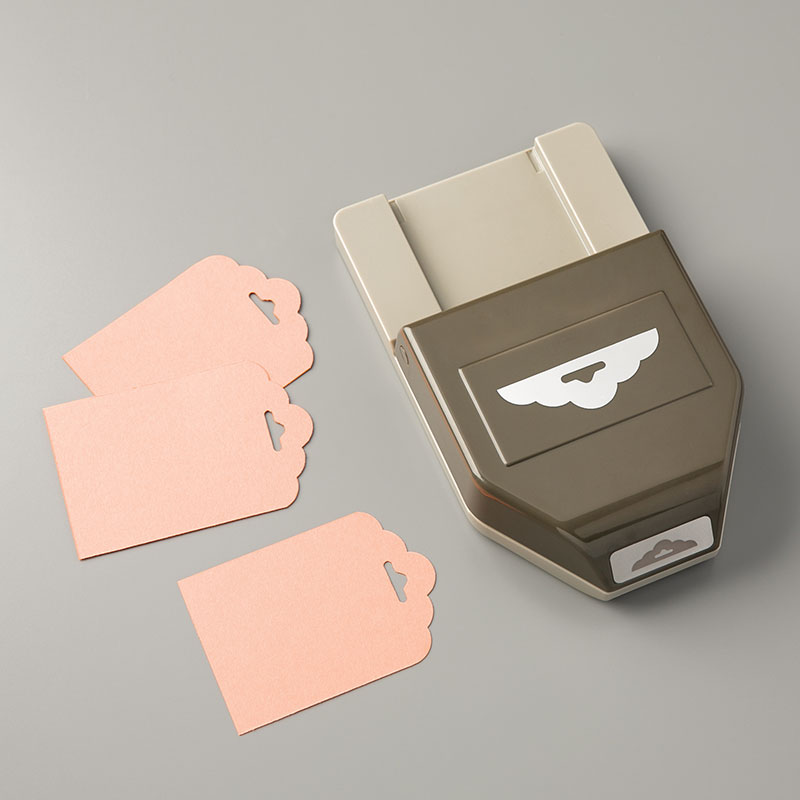
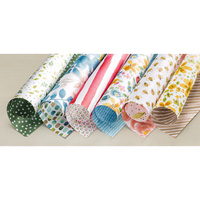
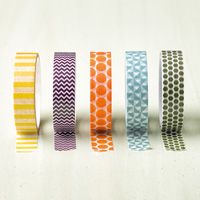
Then there is also one of my very favorite things in the WORLD... Washi Tape  in the Weekly Deals too! The question is what can we make with these two awesome products?  I fee like the challenge this week may include these two concepts.  Tomorrow I will have a fun challenge for you be sure to come back and I may just have something fun to give away!


Downline Training Card Demo
On a different note, I would like to encourage anyone that is looking to start a fun and creative career with Stampin' Up! to join my team.  Currently we have openings for new artist on our team.  Just ask me how, it is simple and FUN!  I am most excited about our downline training.  Last week we had so much fun making a fun demo project.  I am very lucky to be able to love what I do and do what I love.  Here is a quick picture of our downline training project.  If you would love to learn this fun card you can contact me today!  I image this technique with one of the NEW stamp sets... I am thinking the poinsettia collection.  Here is a sneak peek.  ALSO I am adding a few of the new Halloween Sneaks!  If you want to have an open workshop let me know I will design some cute treat baggies and decorations for a Spectacularly Spooky party.   I hope you like a few of the peeks I have and be sure to jump on those Weekly Specials they are great this week.
New! 
New Halloween! 
New for Halloween!  


Monday, August 10, 2015

Spectrum Noir -- an honest review


If you have read this blog for very long you know that I love color.  I love it so much I can't seem to get enough of it.  I buy every collection of pencil, marker and paint!  So when I first started collecting the Spectrum Noir makers I was very excited.  They were a reasonably priced answer to the Copic system.  Or so I thought.

Here is the truth.  I really like the Spectrum Noir markers, they are an intermediate marker.  They are competition to the Copic in some aspect and in others not so much.  I will say for the price I am not sure they are my go to marker.  I still have some to collect but I have a pretty big collection

One part of the collection


HERE IS WHAT I LOVE

  • The price point
  • I like (not love) that they come in the packs but don't like the grouping of them (lights, darks, brights etc) 
  • The accreditation is not WICKED expensive in fact... it's FREE!  (my favorite price) 
  • The artist can make textures easier with this marker than any other I think mostly because of one of the things I don't like the ink saturation
  • EDUCATION ON THEIR WEB SITE!!! 


HERE IS WHAT I AM STRUGGLING TO LOVE
  • The size!  These markers are HUGE.  The design is thoughtful, but not practical for holding for a long time. 
    •   A reader pointed out the caps.. yeah they are HARD to get off.  I can get past the size of the markers but several times I have pull so hard that I have pulled the grey piece off and exposed the barrel.  
  • The amount of ink you need to achieve good blending  when I say you need to saturate, I MEAN SATURATE the paper. This can also lead to some unwanted bleeding. 
  • The numbering system.  I don't like it.  Citrus Yellow?  says who?  I get Yellow Green  JG Jade Green?  is that a Blue Green?  I don't like trying to figure out the tones in the ink.  Jade Green to me is a specific color as is Citrus Yellow NOT color groupings.  
  • The blending is not easy.  You must really really work with them for a long time to get the hang of the blending.  I think this would be frustrating to a new alcohol marker enthusiast.  
  • I don't find the colors to be as true as I would like them to be.
What I do find as the biggest plus, is if you master these pens, you will be able to conquer most any other styling.  Mastering them will take a LONG time, you will need to practice. The color choices will be the hardest thing to learn (which colors work well together to get a great blending). 

I love that the company has so many educational videos and help on the website.  It was what kept me buying.  What I have learned too is the price point is low enough that you really just want to dive in and buy sets.  One here and there may leave you frustrated.  

I hope this is not discouraging review, I believe they are good, solid purchase with good quality. I just want to be honest.  They take work to learn, but remember anything worth knowing takes a little work.  I love mine.  I think they are a great addition to my collection.    

As my dear friend pointed out it may be helpful to see them in action, so here is an image I colored with the SN pens.  It took me a lot longer than I would have liked but I really had to saturate the paper to get a good blend. I do like that like ALL alcohol markers I can return to the piece and add more ink and continue to blend.  I did that with this image.  I found it was bleeding a bit so I set it aside let it dry then came back and it seemed to rectify the problem. 

Colored on standard marker paper. 

I guess what I really want to say here... is if you have these markers, don't get discouraged if you are not coloring like a pro in just a few days.  You really do need practice!  STICK with it, and for the price you will be happy that you did!  I believe the Spectrum Noir brand has a lot of offer, not just the markers but their pencils are on my hit list!  I have used them and think they are the best!  Waiting to also get the aqua markers, and will do a review once I have them in my hot little hands!

Come on back for more fun tips and ideas!

Blessings
Erika


Thursday, August 6, 2015

C.O.W (Card of the Week)


\
Welcome back my friends!

I hope your week is going well!  I have been so busy and so many great new things are in the works.  Did you see the sneak peek of the catalog I posted yesterday?  NO well be sure to check it out right HERE
Normally I will have a challenge for you on Wednesday but with all the new goodies I felt like it was better to show you some sneaks yesterday.  We will get on the challenges soon I promise! Speaking of sneaks be sure to scroll to the bottom of the post to see a few more.

Lets get down to business, today is our Card of the Week (C.O.W.)  I am excited to share a new project with a little instruction for you this week.  I was inspired by this card from the catalog sample, but as always I kind of made it my own. I love that SU! gives us such stunning leaping off points.  This one seemed to fit my mood-- I am happy and grateful for this life I am blessed to lead.  I thank you all for being a part of it.


Today is our Card of the Week.

Thank you for Everything and More

What you will need:
Whisper White 8-1/2" x 11" Thick Cardstock by Stampin' Up!
Whisper White Heavy Cardstock (140272)

English Garden Designer Series Paper by Stampin' Up!
English Garden Designer Paper (138440)


One Big Meaning Clear-Mount Stamp Set by Stampin' Up!
One Big Meaning  (139420)

Pistachio Pudding Thick Baker's Twine by Stampin' Up!
Pistachio Pudding Thick Bakers Twine(135635)

Vellum 8-1/2" x 11" Cardstock by Stampin' Up!
Vellum (101856)


Garden in Bloom Photopolymer Stamp Set by Stampin' Up!
Garden In Bloom Photopolymer  (139443)


Tuxedo Black Memento Ink Pad by Stampin' Up!Blushing Bride Classic Stampin' Pad by Stampin' Up!Mint Macaron Classic Stampin' Pad  by Stampin' Up!Pear Pizzazz Classic Stampin' Pad by Stampin' Up!Banner Triple Punch by Stampin' Up!


Put it together:
  1. Cut an A2 card base (5.5 x 8.5 - score at 4.25) using Whisper White Cardstock
  2. Cut Kraft and White strips from English Garden Designer Pack at 5.25 x 4
  3. Cut Whisper White at 4.75x3.5 
  4. Cut Vellum Strip at 1.5 x 8
  5. Stamp images from Garden in Bloom Stamps onto 4.75 x 3.5 Whisper White bleeding some of the images off the card 
  6. Using the Aqua Pens or paint brush and inks add color to the images. This method creates a lovely watercolor look
    • Tip: if you have a glass mat smear a little ink on to the glass and pick up ink with a wet brush.  This allows for better control of the amount of ink you pick up and does not dilute your ink pad.  If you don't have a glass mat you can also use the top of your ink storage.
    • If you want the centers to be darker like mine are, wet your brush the remove excess water and then load your brush with full saturation of the ink.  
  7. Punch one end of vellum strip to create the banner and stamp sentiment about .25" from the punched end  *Set aside to dry or dry with heat gun
  8. Tie triple bow with Thick Bakers Twine
  9. Adhere Kraft and white Designer Paper to the base of the card
  10. Wrap vellum strip around back of the Stamped colored 4.75 x 3.5 whisper white and crease at desired length.  
  11. Adhere the excess vellum flap to the back of the 4.75 x 3.5 Whisper White (this ensures no adhesive will be seen.
  12. Staple or using a Stampin Dimensions adhere triple bow through the vellum onto the 4.75 x 3.5 Whisper white.
  13. Adhere craft foam (or use Stampin' Dimensions) to the water colored 4.75 x 3.5 whisper white image.  
  14. Adhere completed 4.75 x 3.5 Whisper White with Vellum attached to the front of the card.  

I hope you enjoy making this fun and beautiful card.  Feel free to play with the colors these could be a beautiful bright bouquet as well. To purchase any of the products you see in our COW visit my website by simply clicking HERE


SNEAK PEEKS:
As I promised!  Here are a few more lovelies for you.  If you would like more information on how to become a demonstrator or if you just want to ask a few questions, shoot me an email.  NEVER any pressure. (gzuswins@gmail.com) 
This set... just makes me smile.
I can't wait to incorporate it in a C.O.W. and a workshop! 

How clever is THIS?  I think it is a
great tree for a small space, maybe work?
It would be great advertisement if you wanted
to join my team and let everyone know
The product really does sell itself! 


Have a blessed day my friends... and go Make Pretty Things!  


Blessings,
Erika
For more information on joining my team CLICK HERE.